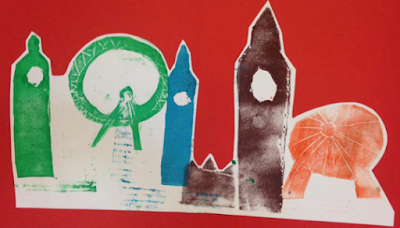
LI- To print my collograph board
Success Criteria
·
Designs for stencils are SIMPLE
·
Cut from the inside, not the edge of the card.
·
Use small amount of printing ink for collographs – less is
more!
·
Take time to ink the block up carefully using a toothbrush in a circular motion
·
Think about how you could repeat your print – rotate etc
Main activity
First talk to children about printing being a repetition of pattern, can use short video clip to demonstrate this in map making. Look for repeated patterns etc.
Two activities are suggested for this session to make the printing process manageable in class. Print collographs from last week. Children should be encouraged to think about their choice of colour for their print limiting their selves to three, using the colour wheel to help them thinking about harmonizing, complimentary or clashing colours. Children could be encouraged to pair up with another child who is printing in a different colour to put their prints together to create a city sky like.
Differentiation
LA
may need support with cutting.
MA may wish to make
more than one stencil to overlap.
Resources
Rollers,
Tooth
brushes,
Ink,
Collograph
boards.
1.Using a roller, roll out the printers ink so that it is no longer tacky, it should be rolled out enough to look shiny but not matte.
2.Then again using the same roller roll the ink onto your printing plate until your plate is loaded with ink.
3.Being carful not to mark your page with ink preventing a clean image transfer place your plate on to your paper with the inked up part facing down.
4. Be sure to rub your hand over the entirety of the back of the plate to ensure a full image transfer. DO NOT RUSH THIS PART. As you can't once you have removed the plate re print over the transferred image.
5. Children once they have printed their own collograph board should share their boards with other children printing each others boards using bright colours to create a colourful printed sky line.


No comments:
Post a Comment